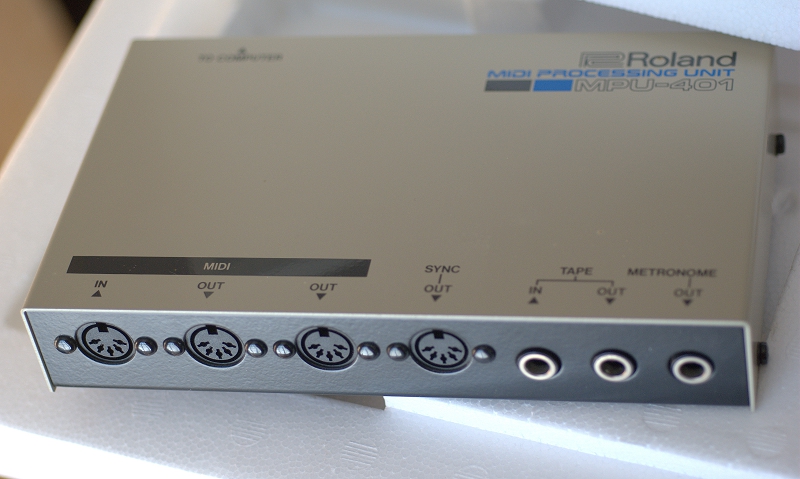
The MPU-401 MIDI interface set the standard for how MIDI devices communicated on the PC. The MPU-401 was an external interface box with its own CPU and memory, attached via a custom cable to an ISA card to the PC. Other interface cards were available for hooking it up to other PC’s including the Commodore 64.

The original MPU-401 supported two modes: Intelligent mode and UART mode.
The Sound Blaster 16 (and most cards since) shipped with an MPU-401 compatible MIDI interface on the game-port. That said, it was only compatible with UART mode. So to be specific, it’s the MPU-401 UART mode that is the standard for PC MIDI.
Intelligent mode let the box do things like run generate a click-track (metronome) by sending a simple command, among other things. In practice though, 99% of software utilized UART mode, which literally broadcasts/listen to raw MIDI data sent out the port.
Reference: http://www.piclist.com/techref/io/serial/midi/mpu.html
Programming the MPU-401
The MPU-401 uses two 8-bit registers to read/write its data.
0x330- MPU-401 Data Register0x331- MPU-401 Command/Status Register (always Data Register’s address + 1)
The default address of the MPU-401’s registers is 0x330, but you can expect to find an MPU-401 anywhere from 0x300 to 0x390 (in increments of 0x10).
To set an MPU-401 in to UART mode, do write 0x3F to the Command register.
M-Audio MidiSport 2x2
This is a USB MIDI device I own. I keep forgetting, but unlike other (cheaper) USB-MIDI devices, this device actually has no firmware. The firmware needs to be uploaded to the device on power-on. THIS is why you need drivers to use it.
On Windows it’s easy, just download the MIDISport from M-Audio.
On Linux, install the firmware package.
sudo apt install midisport-firmware

# also useful so we can do stuff with MIDI (includes `aplaymidi`, `amidi`, etc)
sudo apt install alsa-utils
Now next time you plug in the device and do a aplaymidi -l, you should see the two ports available to you.
aplaymidi -l

# Port    Client name                      Port name
# 14:0    Midi Through                     Midi Through Port-0
# 20:0    MidiSport 2x2                    MidiSport 2x2 MIDI 1
# 20:1    MidiSport 2x2                    MidiSport 2x2 MIDI 2

aplaymidi canyon.mid --port 20:0
Sometimes Midi Audio get stuck and you need to send a panic to the MIDI device. This and many other bulk midi operations (SYSEX dump) can be done with the amidi tool.
aplaymidi onestop.mid --port 20:0

# Oops! Notes got stuck. Lets find out our amidi port

amidi -l

# Dir Device    Name
# IO  hw:1,0,0  MidiSport 2x2 MIDI 1
# IO  hw:1,0,1  MidiSport 2x2 MIDI 2

# Kil all that noise by sending a GM Reset Sysex message (F0 7E 7F 09 01 F7)

sudo amidi -S "f07e7f0901f7" -p hw:1,0,0
Low Latency Linux Kernel Mode
This guide is useful.
By default, Ubuntu ships with a kernel that cannot be interrupted (pre-empted). This could potentially cause audio hiccups. If you check uname -a and don’t see a PREEMPT, then you’re not running a pre-emptable kernel.
In addition, doing a grep ^CONFIG_HZ /boot/config-`uname -r` will tell you the current time tick rate. Ideally for audio you want 1000, not 250 as the defaults may be set to.
To switch kernerls, install the lowlatency package.
sudo apt install linux-lowlatency
After you reboot, you’ll have a much more responsive Linux.